ABC
Backup User's Guide
Program Description
System Requirements
Windows 95/98/Me or Windows NT 4.0/2000/XP/2003
Approximately 2MB of free disk space
Installation
Download the �abcbackupsetup.exe�
file
Make sure you have administrator privileges in
the system where you wish to install ABC Backup.
Start �abcbackupsetup.exe� and follow the
Installation Wizard steps.
Run the program.
Uninstall
Close the ABC Backup program window.
Select �ABC Backup� in the Windows Start menu
and click �Uninstall�.
The Uninstall Wizard will guide you through the
necessary steps.
Or you can use the Windows Control Panel �Add/Remove
programs� applet to remove ABC Backup.
Starting the program
Select �ABC Backup� in the Windows start menu
and click the �ABC Backup� item.
Quick start
Start the program. You will see the main program
window containing the main program menu and toolbar:
Add � add a task
Edit � edit existing tasks. You should select
a task first to make this button enabled.
Delete - delete a task selected
Run � manually start a task selected for immediate
execution
Preferences � change options. Set default
file paths and a naming scheme.

The main window contains the list of existing
tasks along with some of their important properties: task name, file name,
scheduled start time, timestamp, number of completed executions, status
of execution. The list is empty on first start. The user can define tasks,
adding them to the list. The program will count executions and show actual
tasks properties.
To view or edit properties of an existing task,
select it in the list and click the �Edit� button.
Creating a new task
Click the �Add� button. Follow the step-by-step
Wizard instructions to create a new task.
Overview of the New Task Wizard steps:
Step 1. Choosing a name for the project
Enter a name for the new task and a filename to
save its options.
Example: Your Project 1
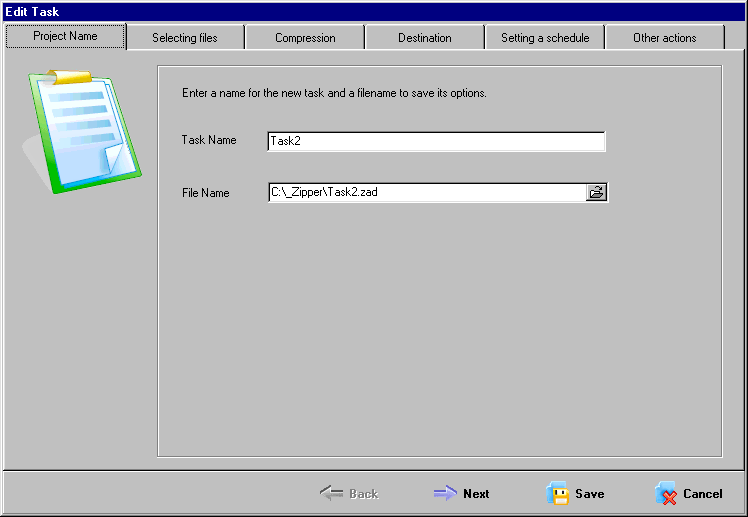
By default the program uses �Task 1� as
a project name. And �task1.zad� as a file name.
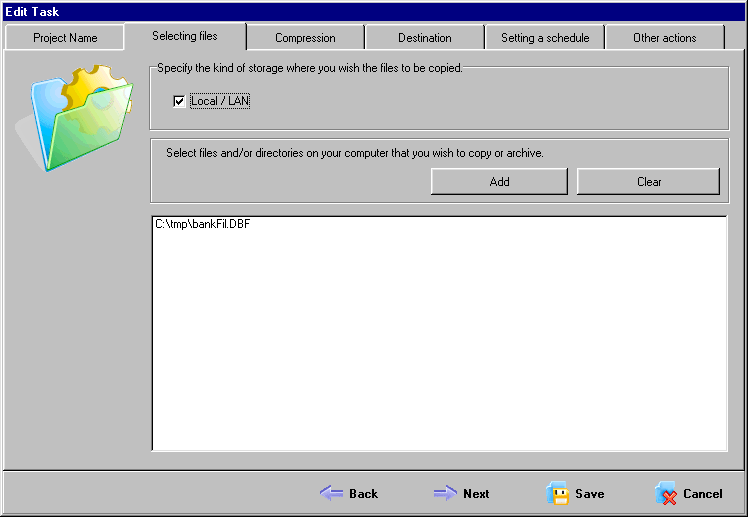
Step 2. Selecting files
Specify the kind of storage where you wish the
files to be copied from. For example, a folder on your PC or a directory
on a remote server. Then click the �Add� button and select files and/or
directories on your computer that you wish to copy or archive.
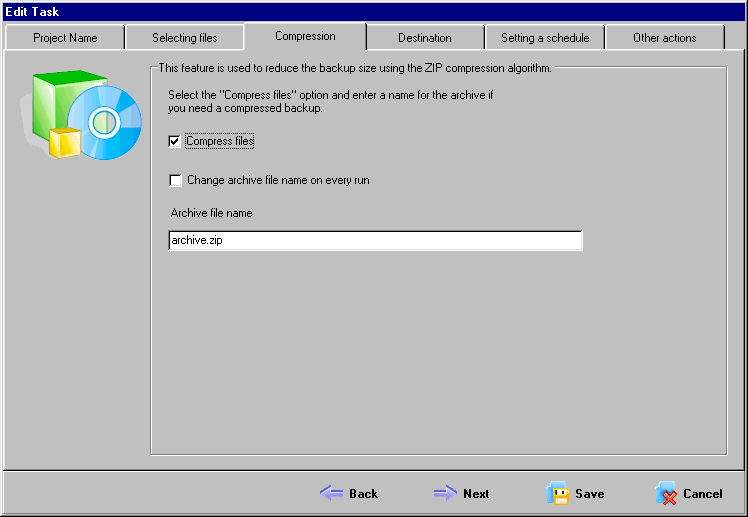
Step 3. Compression
This feature is used to reduce the backup size
using the ZIP compression algorithm. Select the �Compress files� option
and enter a name for the archive if you need a compressed backup. Select
the �Change file name on every run� option.
Step 4. Destination
Choose the type of the destination storage.
Local/LAN - if you wish the files
to be copied onto a local disk or a disk that is available through your
LAN
FTP � if you need the files to be copied to a
remote server via FTP.
Then, select a target directory where you wish
the files to be copied or a file name for a solid archive. In order to
do this, you should select appropriate options from �Copy compressed archive�,
�Copy files as is (Mirror)�, �Delete source files�.
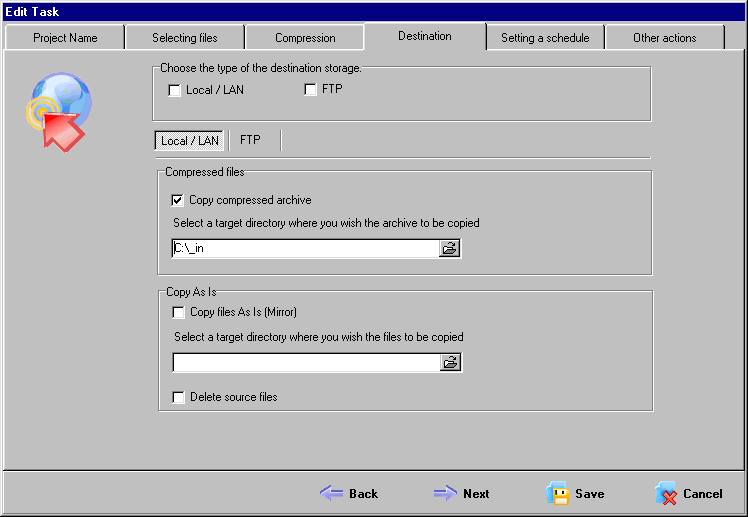
For an FTP transfer, enter your login information
and the path where you need to copy your files.
Step 5. Setting a schedule
Select the interval and time to begin the event.
Enter the start and the end date. Then choose a period:
Daily � select the number of days
Weekly � select day(s) of week
Monthly - select the day of the month
Once � Enter the exact date

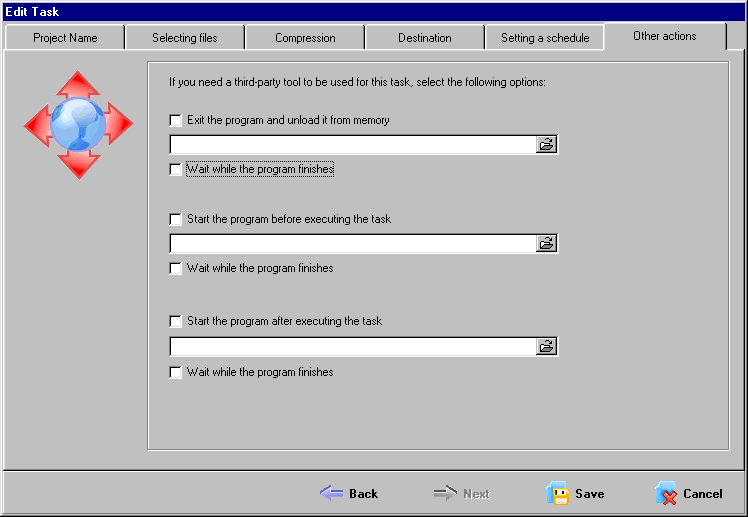
Step 6. Other actions
If you need a third-party tool to be used for
this task, select the following options:
Exit the program and unload it from memory
Wait while the program finishes
Start the program before executing the task
Wait while the program finishes
Start the program after executing the task
Wait while the program finishes
In this manner, you can start or stop third-party
applications before or after making backups.
Step 7. Save task
Your new task is now saved. It will be executed
at the time scheduled if ABC Backup is running on your PC.
Editing a task
You can edit task properties later. Select it
in the list and use the �Edit� function.
Executing a task
You can start a task manually, if needed, without
scheduling its start time. Simply select it and click the �Run� button.
Deleting a task
Select a task and click �Delete�.
Preferences
After installing the program all preferences are
set to their default values. Use the �Preferences� button to edit them.
The first page of the preferences dialog contains
the following options:
-
Start the program automatically on system start
-
Only one instance (do not start another copy of the
program if one is already running)
-
Minimize to tray. The program will sit in the system
tray after using the Exit function.
-
Notify when a scheduled task is executed
-
Save windows position
The second page contains the following options:
-
Default task name
-
Path to the folder where tasks files are saved
-
Default compressed archive name
-
Default path to save compressed archives
-
Default folder to copy files �as is�
Change necessary options and click �Save�.
Download
ABC Backup

